
How Do I Put Surface on My Bowling Ball?
National Bowling Academy EditorsApplying surface to your bowling ball using a sanding pad is vital to your success out on the lanes. If your bowling ball isn’t reacting the way you’d like, changing the bowling ball surface will help create the ball motion desired to strike more consistently. In this free video, Ronald Hinkland Jr., CEO of Creating the Difference, walks you through the process of how to sand a bowling ball.
Get the Numbers
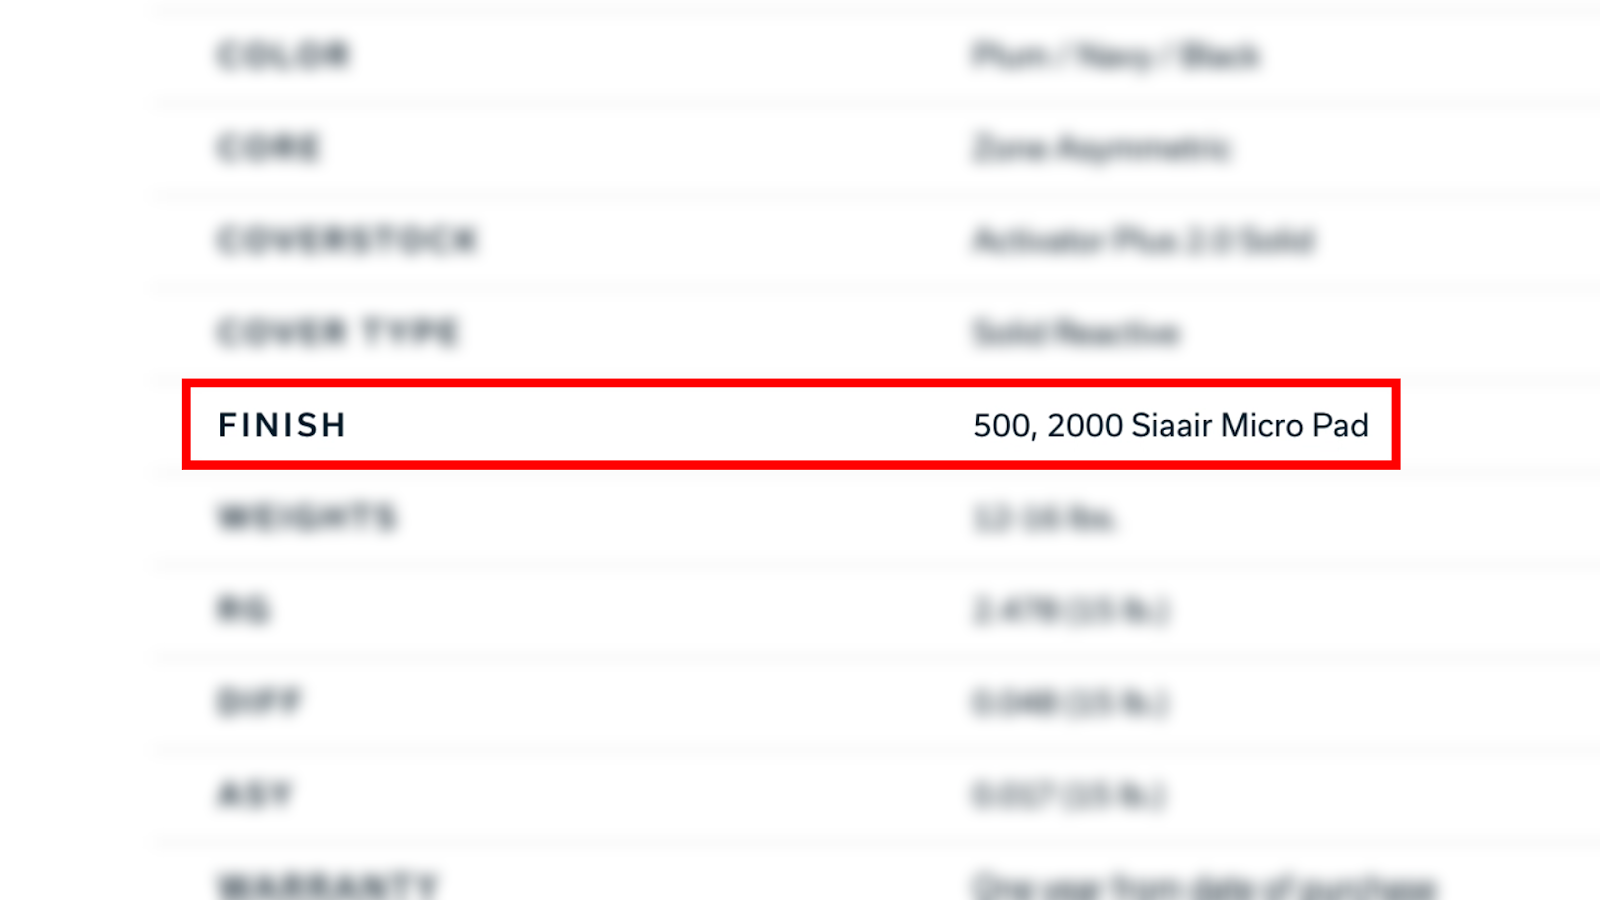
It’s important to identify what grit was used when your bowling ball was originally sanded. You can find this information on your ball manufacturer’s website.
In this example, there are two grit numbers, 500 and 2000. In order to obtain a 2000 grit finish, the manufacturer had to apply surface to the bowling ball twice, first with 500, next with 2000.
TruCut sanding pads, from Creating the Difference, are designed to eliminate the need to apply 500 grit to obtain a true 2000 grit surface on your bowling ball. This eliminates extra work to get the surface of the bowling ball where you want it, the first time.
How to Sand a Bowling Ball
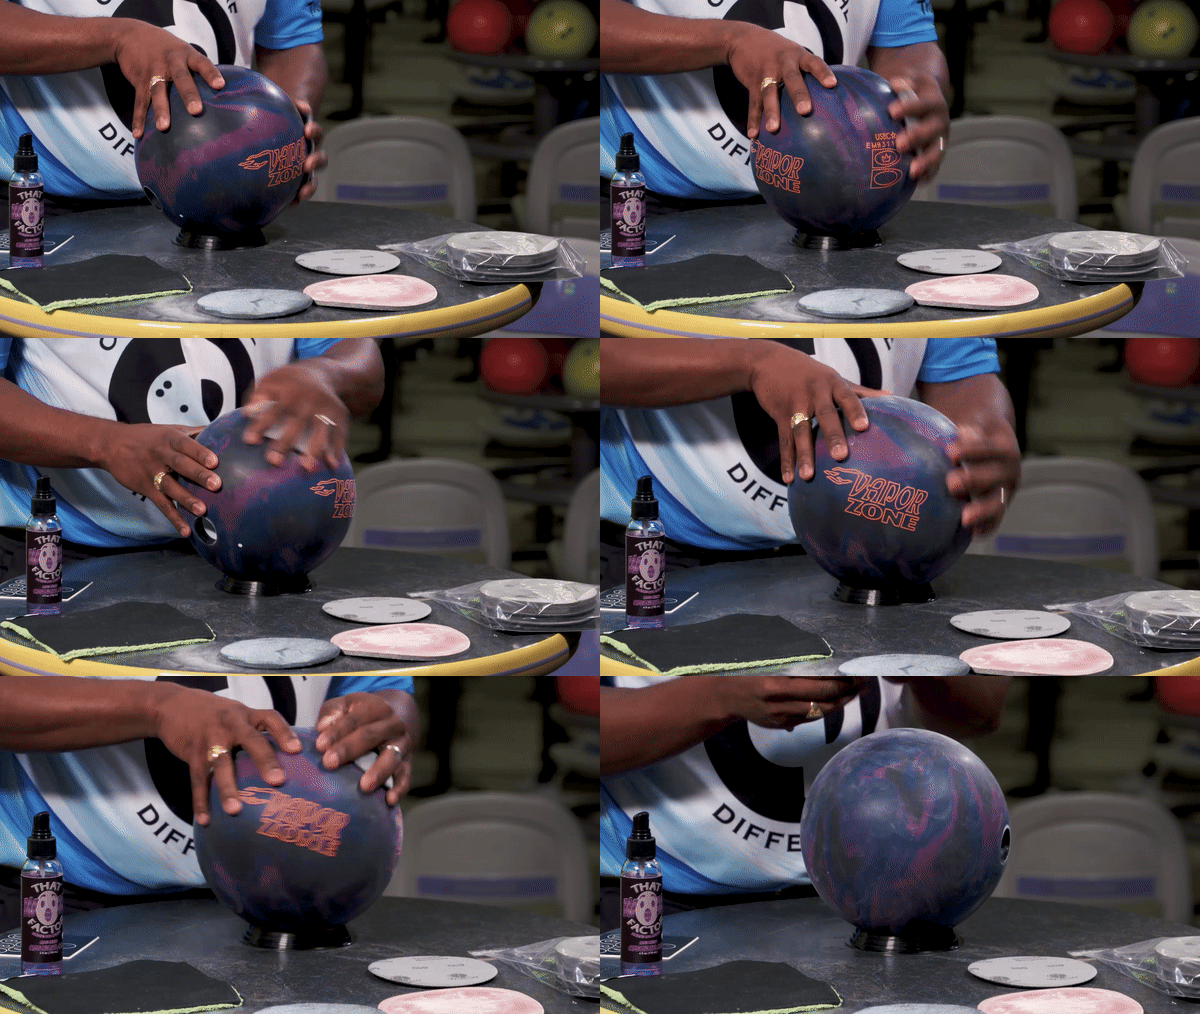
Start by sanding half of the bowling ball on the sides and the top, twice.
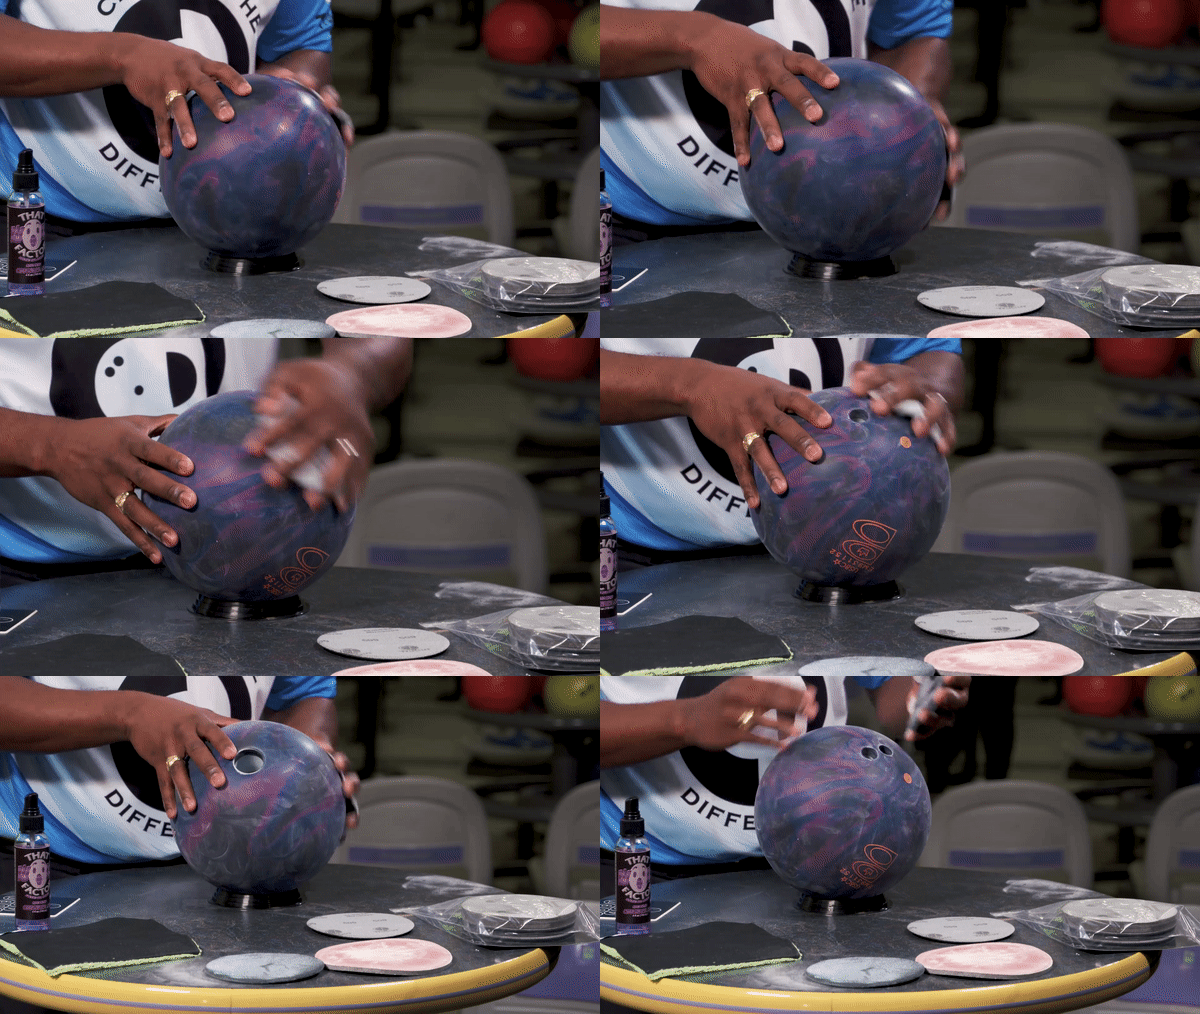
Next, flip the ball over and repeat the process.
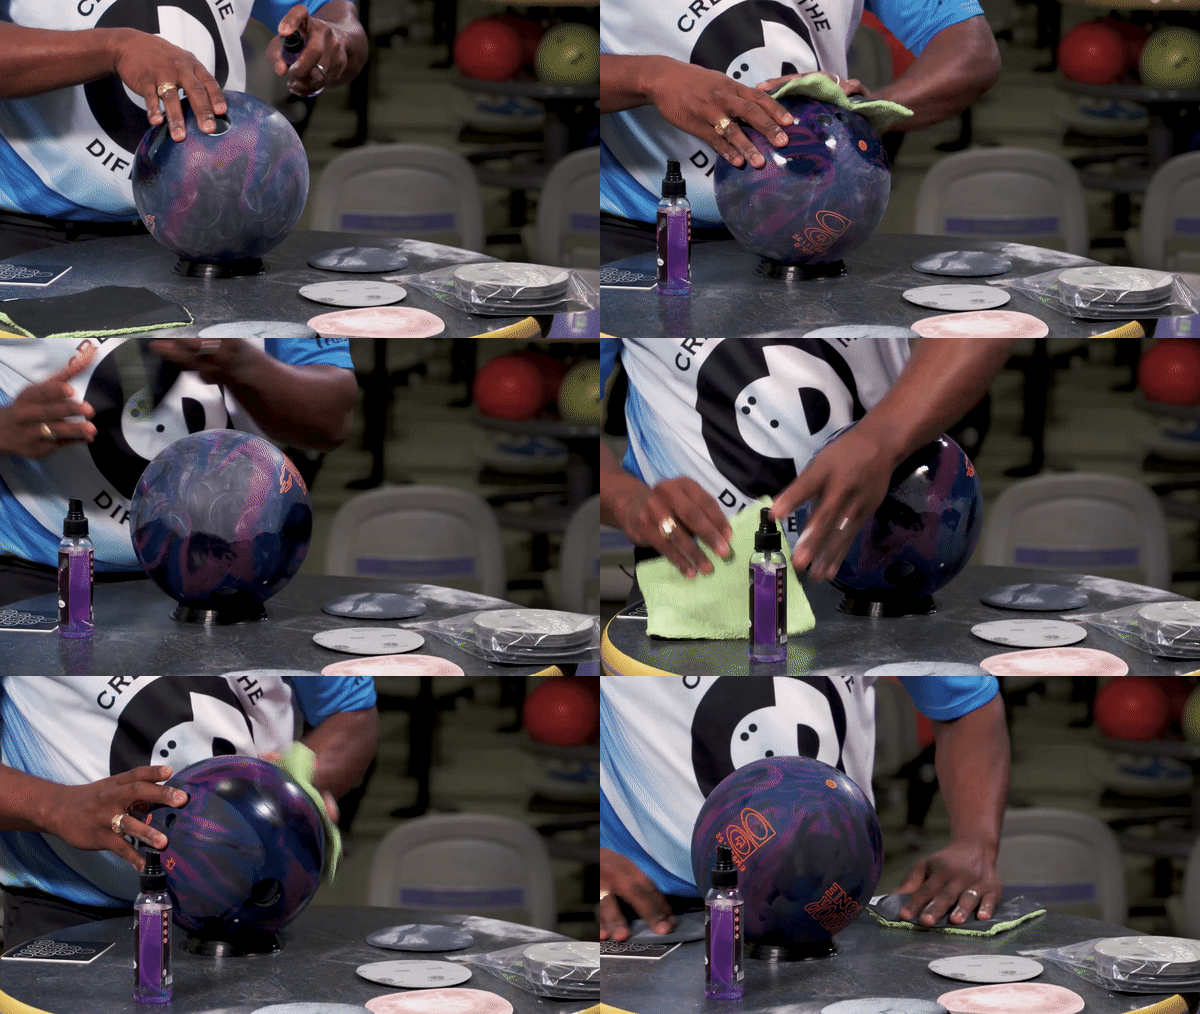
Finally, clean the bowling ball using cleaner to remove the dust from the surface.
Per USBC rules, if you are going to sand your bowling ball you must hit the entire bowling ball surface. Learning how to sand a bowling ball properly will help you achieve this. Remember, this can only be done before or after competition.
Maintenance
The surface of your bowling ball is affected every time it touches the lane. Lane Shine is created by the ball return systems and also plays a factor in how your bowling ball changes surface.
Keeping all of that in mind, follow these simple maintenance guidelines: 1) Clean your bowling ball before and after competition with a bowling ball cleaner. 2) Apply desired surface (sand your bowling ball) every three to six games.
You can learn how each grit reacts on the lane in “Bowling Ball Surface Adjustments” and our Bowling Equipment library is full of helpful tips from our expert coaches.
Products used in this video:
CEO, Ronald Hickland from creating a difference. I want to talk to you about how to properly sand your bowling ball. The first step that you're gonna want to do in the process is go to the manufacturer's website and look up what they say they finished the bowling ball at. This ball in particular happens to be finished at 500 grit, 2000 grit. Now, why that's important is because the manufacturing uses multiple steps to end up getting to the final grit.
This pad right here happens to be a similar pad that the manufacturer uses and it's 500 grit. This pad right here is also a pad that is 500 grit but it's the TruCut pad. They don't look the same and they don't cut the same. And that's one of the big differences here. With the TruCut pad system what you're going to be able to do is go right to the final grit number.
You don't have to do that 500 grit step because you're gonna be able to get the 2000 grit by using the TruCut pad. The process is very, very simple. You're gonna want to go around the sides of the ball first and then go to the top. Only doing half the ball at a time. You'll go around the side again, go to the top, we'll flip the ball over and do the other side the exact same way.
What that's gonna do is allow you to get a fairly even and consistent finish. Let me show you how that looks, what it looks like. Here's the pad. Here's the ball. Light pressure, nothing too crazy.
Just going around the sides of the ball. The reason why you go around the sides of the ball twice is because you can't put as much pressure on the sides of the ball as you can on the top. So, now we went around the ball twice and we go to the top. Back on the side again. One more go around Back on the top, light pressure.
Okay, there's the dust on the pad. The best part of this pad is you can hit it and knock the dust right out. Pad's clean Flip the ball over, same process. Around the sides of the ball twice. Like so, and then on the top.
Back on the sides again. And back on the top. Pad's dusty, pad's clean. Last but not least you'll wanna spray and get the dust off You can tell the ball's dusty. we'll spray the ball with a little bit of Wow Factor Ball Cleaner, wipe it off.
All we're going to do is just get the ball nice and clean. Flip it over, spray it again Wipe it off. And now your ball is clean and ready to go back into action. Now you say, "Hey, that's great, Ron but how often should I do this?" Well, the truth of the matter is you should probably do this every six every three to six games depending on what you're bowling on. If you want to keep your surfaces as aggressive as possible the more often you can do that, the better you should do it.
Also make sure you keep the bowling ball clean with the ball cleaner before and after competition because that will also help to keep the surface on the bowling ball at its peak performance. You know, one of the things people always ask is "Is man well, if I have a 2000 grit ball and I have a 500 grit ball, will they go are they gonna roll the same? Or how much difference are they?" Well check out our other video to check out the difference in performance between a 500 grit ball and a 2000 grit ball. Also, there's a real big difference between, "Hey, what happens if I go with the 500 grit, 1000 grit, 2000 vs. the 500 grit, 2000, is there a real big difference there?" Well with the TruCut system there's not gonna be a difference because the TruCut pad cuts at what it says it cuts at.
So the 2000 grit TruCut pad will remove the 1000 and the 500 grit whereas that may not be the case with all pads. It definitely is the case with the TruCut pads. As always, if you have more questions or need more information make sure you check us out at CTDbowling.com Ronald Hickland, CEO from Creating The Difference. Have a great day.
Where can a get the sanding pads